How to reinstall VPN Master Pro on Windows
In this tutorial, you will learn how to reinstall the VPN Master Pro application on your Windows device.
Reinstall VPN Master Pro on Windows
Follow the steps below to completely remove and freshly reinstall the VPN Master Pro application on your Windows device.
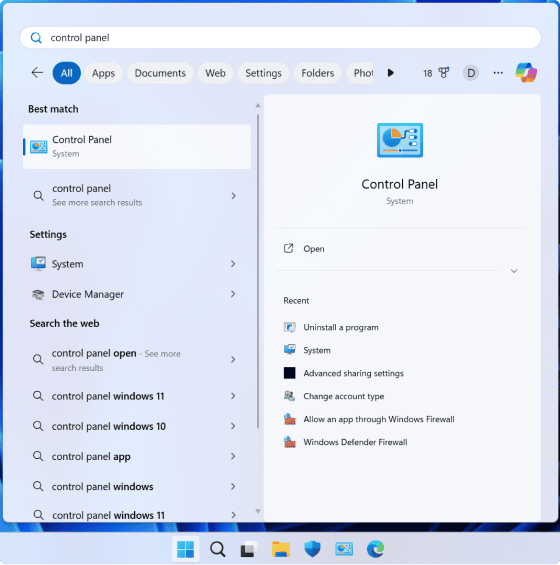
Step 1: Open Control Panel
Press the Windows key, type "Control Panel", and open it.
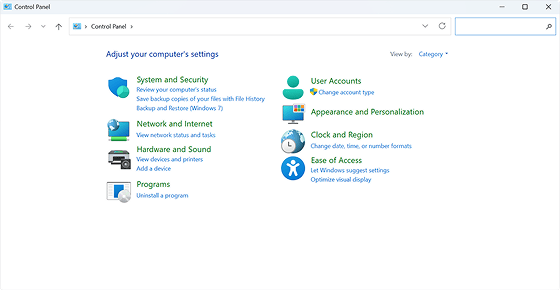
Step 2: Go to Programs and Features
Click "Uninstall a program" under the Programs section. This opens the list of installed applications.
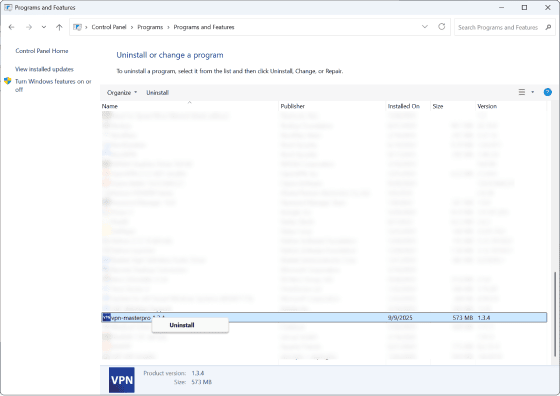
Step 3: Uninstall VPN Master Pro
Find "VPN Master Pro" in the list, right-click it (or select it) and choose "Uninstall" or "Uninstall/Change".
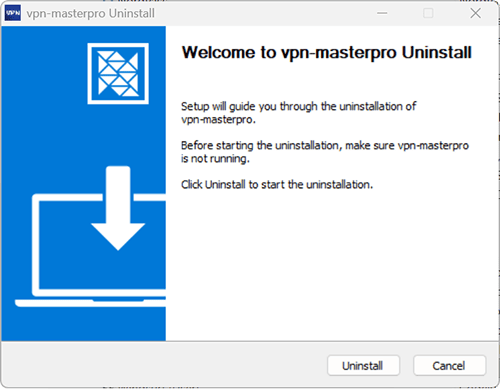
Follow the uninstaller prompts and complete the process.
Step 4: Reboot Your Device
Restart Windows after uninstalling to ensure old services, drivers, and cached components are fully removed.
Step 5: Download the Latest Installer
Go to the official website and download the newest version of the app: VPN Master Pro Download Page
Avoid third-party or unverified sources to prevent corrupted or outdated installers.
Optional: Remove Leftover Files Manually
Only perform this if you are comfortable with Windows file management:
- Press 'Win + R', type '%ProgramFiles%', and press Enter. Delete any remaining VPN Master Pro folder.
- Press 'Win + R', type '%AppData%', and remove leftover related folders if present.
- Open Device Manager and ensure no inactive virtual adapters remain.
Then download and reinstall again.
Step 6: Install the Application
Now follow the article on How to setup VPN Master Pro on Windows for detailed installation instructions.
Need More help?
If you are experiencing issues, please reach out to our support team for assistance.