How to disable IPv6 on Windows
This article walks you through the steps to manually disable IPv6 on your Windows device.
IPv6 may be the latest version of IP addressing, but switching it off can actually help VPN users. With VPN Master Pro, disabling IPv6 prevents leaks and makes your connection more stable overall.
Disable IPv6 on Windows 10 and 11
Step 1
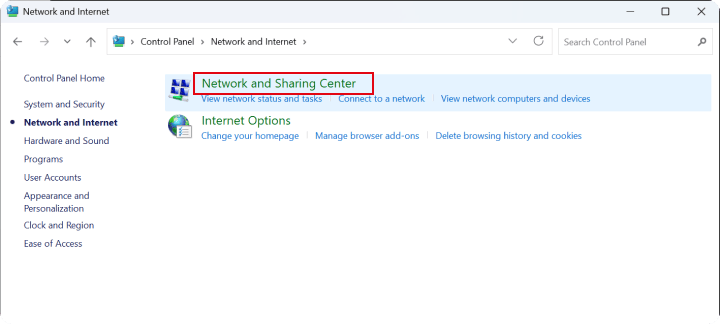
Open Control Panel and click on "Network and Internet" settings.

Step 2
Click on "Network and Sharing Center".
Step 3
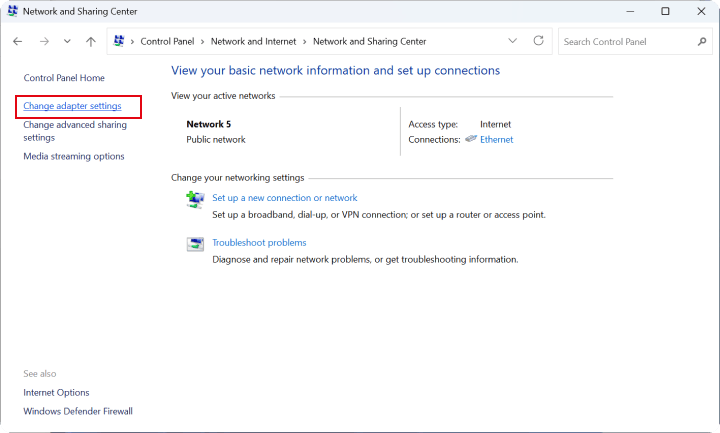
Click on "Change adapter settings".
Step 4
A window with all network adapters will open. Right-click on the active network adapter and choose the Properties tab. The green connection bar next to it indicates the active adapter.
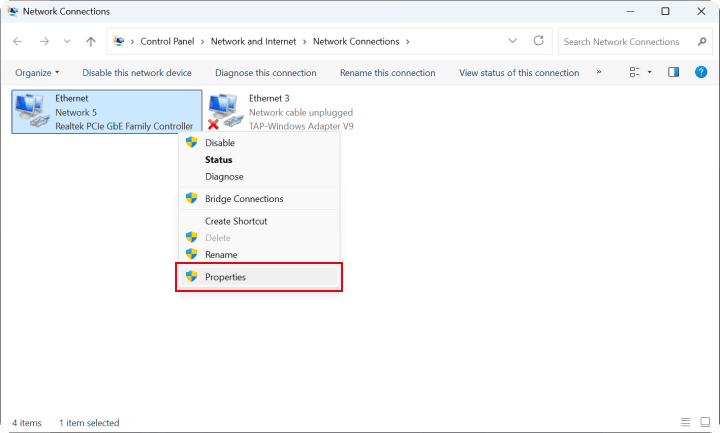
If you connect to the Internet via an Ethernet cable, Ethernet is your active adapter.
Step 5
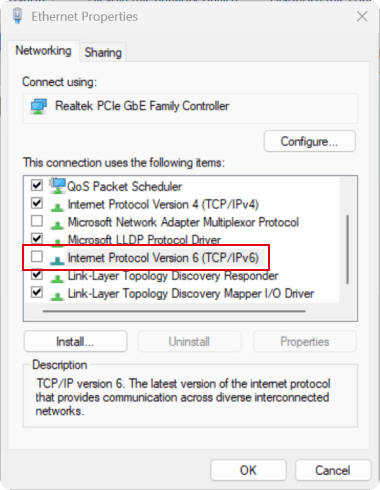
In the Networking tab, scroll down to find "Internet Protocol Version 6 (TCP/IPv6)". Uncheck the box next to it and click OK to save your settings.
Disable IPv6 on Windows 7
Step 1
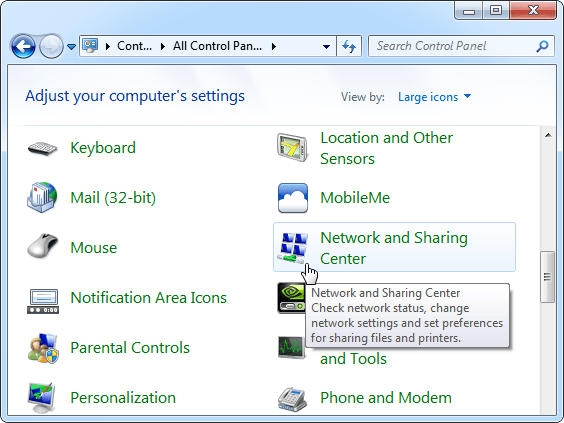
Open the Windows Start menu and click on the Control Panel. Once there, select Network and Sharing Center.
Step 2
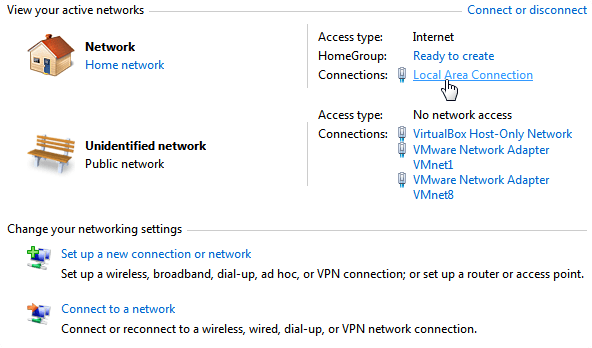
In the new window, click on the Local Area Connection button next to the connection you wish to modify.
Step 3
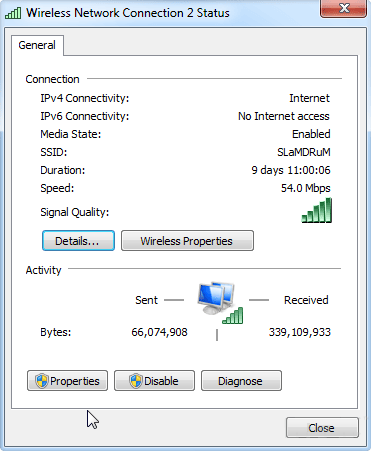
Another new window will pop up, select "Properties".
Step 4
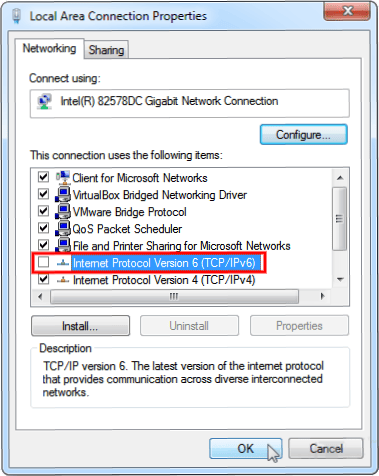
In the Networking tab of the console, scroll down to find "Internet Protocol Version 6 (TCP/IPv6)". Uncheck the box next to it and click OK to save your settings.
Re‑enable Anytime
If you need IPv6 later, return to the adapter properties and check the IPv6 box again.
Need More help?
If you are experiencing issues, please reach out to our support team for assistance.